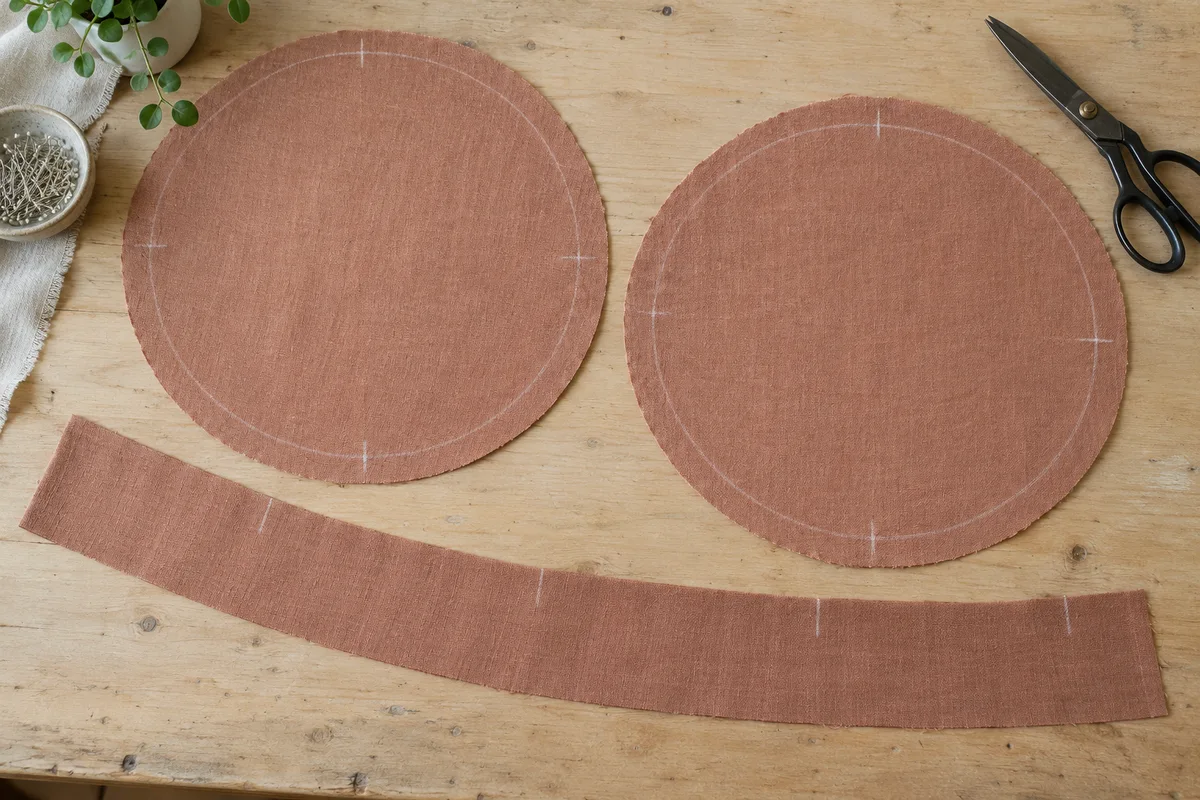
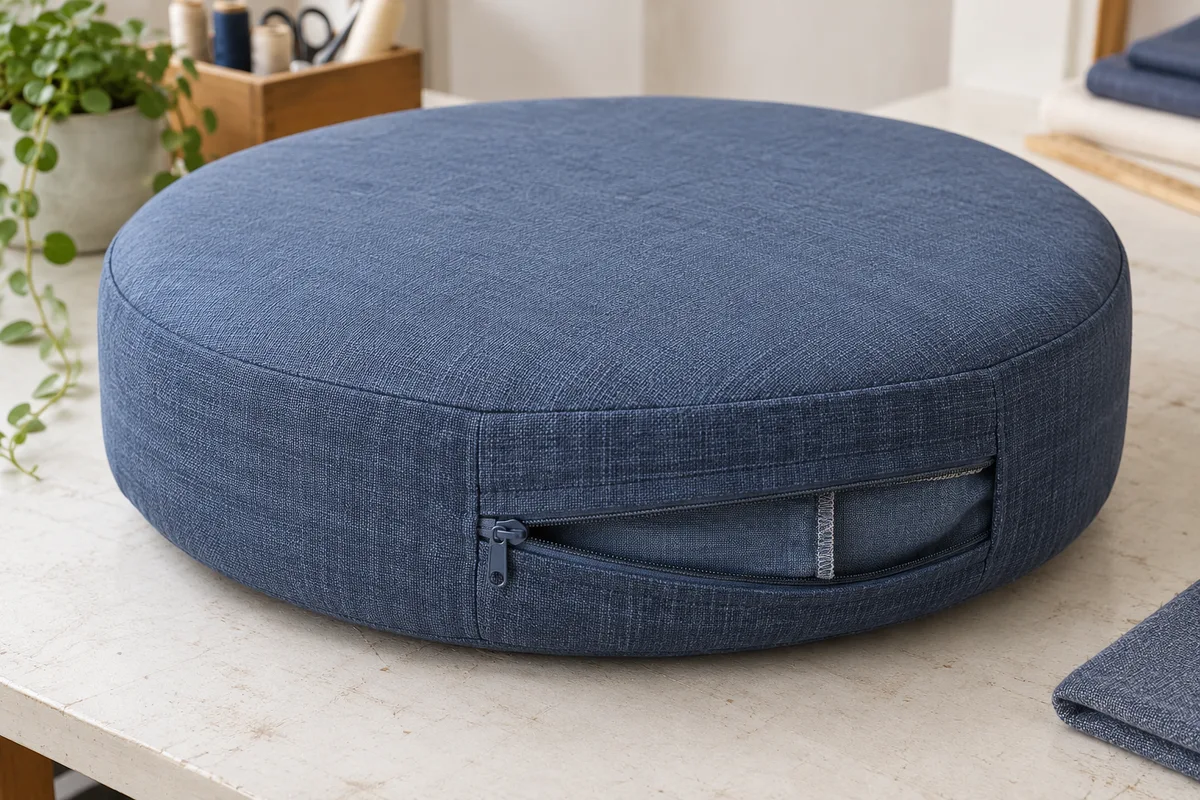
Turn a finished circle and a chosen edge construction into a clear cutting plan. See the seam line, raw circle, boxing sections and quarter marks together before preparing your fabric.
Private, on this device
Plain fabric, two circular faces, with an optional straight boxing band. Boxed covers support a zipper section or hand-closed turning gap; two-circle covers use a turning gap. No foam fitting, tufting, piping, pattern matching or shaped upholstery is calculated.
EXAMPLE
Example inputs: replace with your measured project.
Download example JSON · Private file processing in this browser. Export a backup for other devices.
Templates: print at 100%, turn off fit-to-page and check the 50 mm square. Cut two circles per cushion from the same template. Up to 64 tiled sheets plus a calibration page.
Saved on this device
An independent local project; JSON is your portable backup.
Define the sewing lines before the cut edges
01
Choose the cover diameter deliberately
Enter the finished diameter at the sewing line. This is the cover you intend to sew, not automatically the foam diameter or the outside measurement of a filled cushion. Foam firmness, batting and fabric behavior can change the fit you want. Decide any ease with your own sample first. The program adds a radial seam allowance but does not choose a compression rule for the insert.
02
Select a boxed or two-circle construction
A boxed cushion has a separate side band whose finished height is measured between its upper and lower sewing lines. A two-circle cover joins its round faces directly; it has no independently specified side height. The filled shape in that mode depends on the stuffing. Switching boxing off disables its height and zipper settings, while keeping their previous values for a later comparison.
03
Define the opening and its allowances
For a boxed zipper cover, enter the finished length of the zipper section around the circumference. This section replaces part of the ordinary boxing. The two zipper halves each receive an outer seam allowance and the fabric turn required by your tested zipper method. For a hand-closed construction, specify an opening along the seam, centered on the Q0 reference. Confirm that your insert can pass through it.
04
Check the layout and print a proof
Enter the actual usable fabric width, the number of identical covers and one batch reserve. Inspect the raw cut sizes and the square blanks used for circular faces. Print the construction record for the worktable. If you need a paper circle, use the separate full-size template action, select actual size and measure the calibration square before taping or cutting any paper.
Make the curved and straight seams agree
Quarter marks give you common references
A circular raw edge is longer than its sewing line, so aligning raw lengths by stretching them is unreliable. Mark Q0 through Q3 on the stitch circle and the corresponding arc lengths on the boxing. Match those references during assembly, keeping the chosen seam allowance consistent. The illustration is a visual guide; the program’s numerical coordinates and paper template provide the dimensional references for your own project.
A zipper section replaces part of the band
The opening is a construction segment, not an extra strip laid over a full continuous boxing piece. Sew the two zipper halves into one section with the intended finished band height, then join that section to the remaining boxing. Check the zipper tape and stops separately. The entered section length describes the finished fabric segment; it does not claim to specify the exact zipper product you should buy.
Check the numbers
A 16-inch round cover with 3-inch boxing
The English example uses a 16-inch sewing-line diameter, 3-inch boxing height, 1/2-inch seams, a 16-inch zipper section, 3/4-inch turns on each zipper edge, 54-inch usable fabric and a 4-inch batch reserve.
The sewing circle is 16 inches in diameter, so the circumference is π × 16, approximately 50.26548 inches. Adding 1/2 inch outward at every point makes the raw circle 17 inches in diameter. Cut two of these circles, using one 17-inch square blank for each.
The zipper section accounts for 16 inches of the sewn circumference. The remaining band contributes approximately 34.26548 inches. Add one 1/2-inch end seam at each end: its raw length is about 35.26548 inches, and its raw width is 3 + 1 = 4 inches.
Each zipper half has a raw length of 16 + 1 = 17 inches. Its raw width is half the finished band height, plus the outer seam and zipper turn: 1.5 + 0.5 + 0.75 = 2.75 inches. Two halves reconstruct the intended 3-inch finished height after the turns and seams are consumed.
The conservative shelf places both 17-inch circle blanks, the 4-inch boxing and the two 2.75-inch zipper halves across the roll: a combined width of 43.5 inches. The longest piece sets occupied length at about 35.26548 inches. With the 4-inch reserve, the batch needs about 39.26548 inches, or 1.09071 yards. No extra circle-nesting saving is assumed.
Adding a seam allowance to the diameter and then calculating that larger circle’s circumference makes a band too long for the intended seam line. The correct references are the original finished circumference and the separate joining allowances on the straight band. Keep those values distinct when checking a hand calculation or transferring a mark.
Openings need an insertion check
A numerically valid zipper or turning gap can still be too short for a firm insert. Test the proposed opening against the actual foam, batting and closure method. The tool limits a turning gap to half the circumference and requires a zipper section to leave room for the remaining band and its joins. It does not determine how much the filling can safely compress.
Fabric width controls the plan
Both round faces are budgeted as complete square blanks. The program does not split an oversized circle across a seam, rotate rectangular pieces automatically or stagger circles to claim a saving. When any required width exceeds the usable fabric, the plan remains a warning draft and the yardage, coordinates and cutting-label actions are withheld until it fits.
Keep one tested template with the batch
The paper circle is reused for both faces and for identical covers. Mark the project name, selected seam allowance and quarter reference on the assembled paper. The printed pages overlap by ten millimeters. Match shared drawing lines within that overlap, then check the complete diameter as well as the calibration square before treating it as a production template.
The method, explained
The geometry behind the cutting record
Rule version 1.0.0
Circle and continuous boxing
For sewing-line diameter D and seam allowance S, the cut circle diameter is D + 2S. The matched sewing circumference is πD, rounded to the stored micrometer. A continuous band uses circumference + 2S in length and finished boxing height + 2S in width. The end allowances close the band into a ring; they do not enlarge the intended sewn circumference.
Zipper sections and cumulative marks
A zipper section of finished length Z leaves circumference − Z for the ordinary band. Both segments gain two end allowances. Each zipper half is half the finished boxing height plus an outer seam and its zipper-edge turn. Quarter arcs divide the sewing circumference into four parts. Assembled-band raw references start one end seam before Q0; individual segment raw lengths are not interchangeable with that common origin.
Fabric rows and printable scale
Prepared pieces are placed in order on shelves without rotation. A shelf ends at its longest piece; the next shelf begins there. The batch reserve is added once after the last shelf. For a circle template, the SVG uses millimeter dimensions on A4 or Letter pages with fixed overlap. Browser and printer scaling still need a physical check, so the template includes a 50 × 50 mm calibration square.
Do I enter the foam diameter or the finished cover diameter?
Enter the diameter you want at the cover’s sewing line. Decide the relationship to the foam and batting before using the tool. There is no universal subtraction for every foam firmness or fabric. A sample cover gives a better fitting reference than applying the same tightness assumption to every material.
Why is my boxing longer than the finished circumference?
Its raw length includes end seam allowances. After you join the ends, those allowances are consumed and the sewn band matches the original sewing circle. With a zipper section, the ordinary boxing and assembled zipper section each have their own pair of end allowances, because they meet at two joins.
Can I make a round cushion without a side band?
Yes. Turn off separate boxing to produce two circular faces with a hand-closed turning opening. The diameter still describes the seam circle. That mode does not calculate a particular filled thickness, a gathered pouf, a button-tufted shape or a foam core. These require different fitting and construction decisions.
How do I print the circle at the correct size?
Choose the full-size circle action, the matching paper size and 100% or actual-size printing. Disable fit-to-page and browser headers and footers. Measure the printed 50 mm square in both directions, then assemble the ten-millimeter overlaps. Check the overall cut diameter too. A browser PDF is useful, but it cannot verify your physical printer calibration.
Are circle labels actually square cutting instructions?
No. They explicitly identify a circle and explain that the listed width and length are its square preparation blank. Cut the round outline with the matching source template. The rectangular dimensions are used to reserve enough roll area and to organize the cutting list; they do not change the intended shape.
Does the fabric total include piping and shrinkage?
It includes the displayed face circles, enabled boxing or zipper pieces and one user-entered reserve. Piping, lining, shrinkage prediction and decorative pattern placement are outside this calculation. Prepare fabric as appropriate before measuring usable width, and plan additional materials separately instead of assuming they are hidden inside the result.
Take the plan to your worktable.
Review the measurements, keep a backup and print a proof.