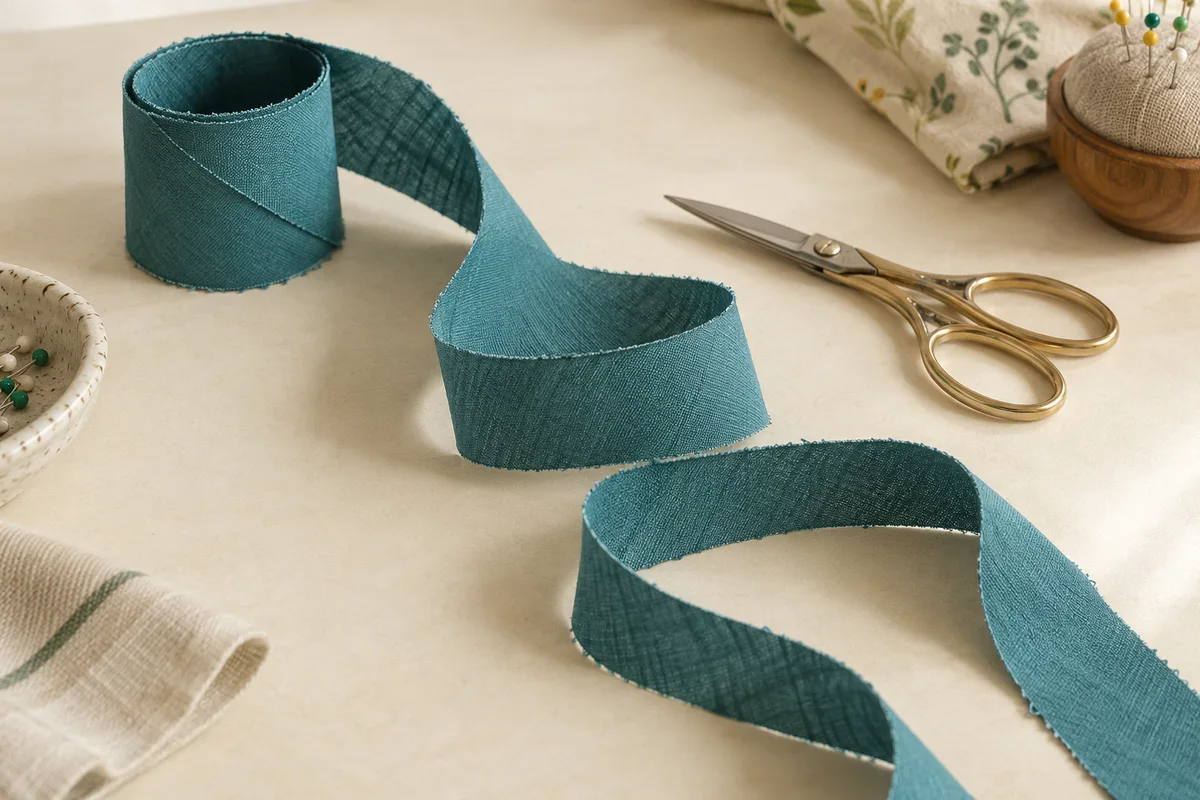
Work from a required strip length or a square of fabric you already have. Keep raw width, seam reserve, trimming and the one-strip tube offset visible in one practical planning record.
Private, on this device
One supported method: a true square made into a parallelogram, then an offset tube with two joins. Output is an explicit planning estimate, not guaranteed production yield. Rectangular starts and individual joined strips use different geometry.
EXAMPLE
Example inputs: replace with your measured project.
Download example JSON · Private file processing in this browser. Export a backup for other devices.
CSV and PDF retain the estimate assumptions. Test the tube on a sample and measure the relaxed strip before relying on the yield.
Independent local project
Export JSON to keep a portable backup.
Choose the inputs that describe your actual method
01
Enter the strip before it is folded
Raw strip width is the distance between cutting lines. It is not the visible finished binding width and not necessarily the number printed on a tape maker. Folding style, cloth thickness and how the binding wraps an edge affect that relationship. Prepare a short sample with your actual fabric and equipment, measure its unfolded width and enter that tested value.
02
Start with a target or with stock
Target mode finds a square whose estimated usable strip reaches the requested length under the selected reserves. Existing-square mode instead reports the estimated result of a measured square. Trim away selvages and square the cloth first. A rectangular remnant cannot be represented by averaging its sides: this version only supports a genuinely square start.
03
Make losses explicit
Enter the seam allowance for the two tube-method joins. Then choose an additional whole percentage for imperfect final bands, pressing and other trimming, and a total length to remove from the two strip ends. These are planning assumptions, not measurements of your sewing accuracy. Increasing a reserve should reduce yield or increase the required square; it should never be hidden inside an unexplained total.
04
Check the square against the fabric
The calculated square must fit within usable width. The page flags a square that is too wide and does not silently piece it from smaller scraps. You can obtain wider fabric or make separate batches with their own losses and later joins. Keep the JSON assumptions with the printed estimate, then record the relaxed strip length from a sample before preparing important work.
See why the offset matters
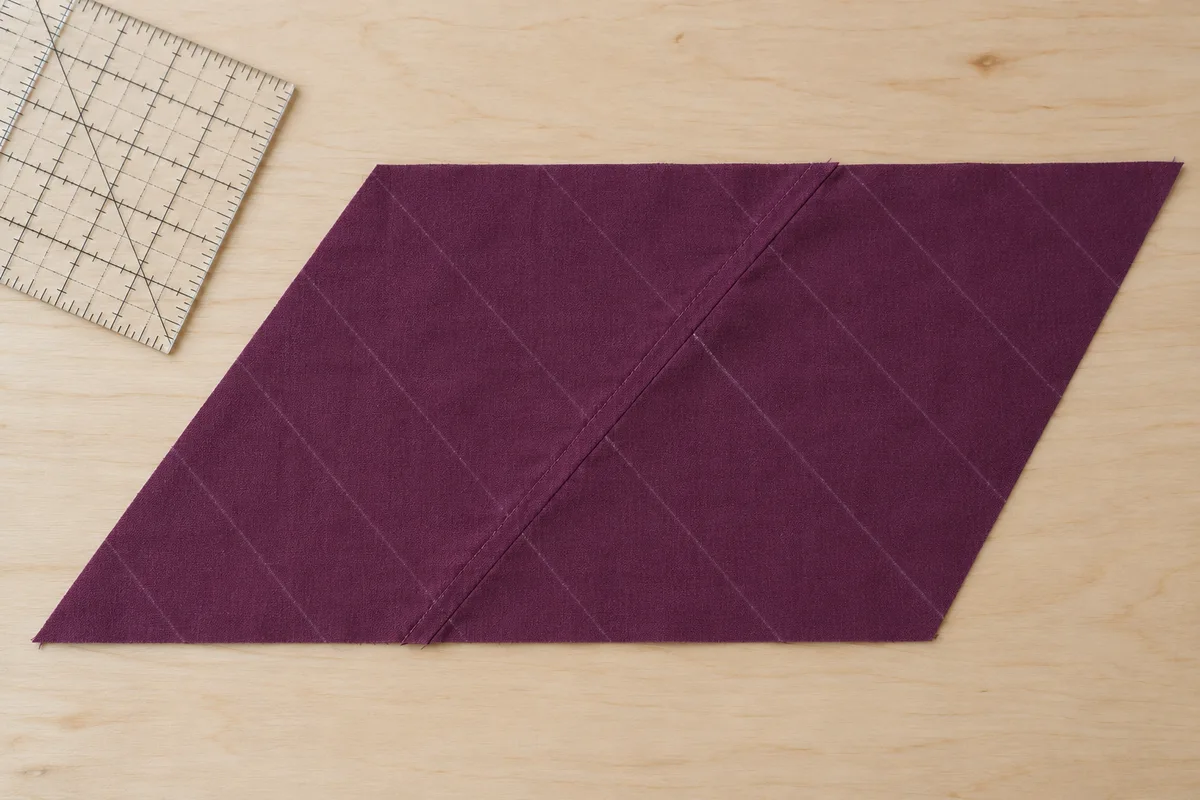
Mark the flat parallelogram first
The square is divided diagonally, and its straight-grain edges are joined into a parallelogram. Mark parallel cutting lines at the selected raw width along the bias direction. The final incomplete band needs trimming; its existence is one reason that square area divided by width is an upper bound rather than a reliable production promise. The photograph illustrates the stage, not an exact geometry to trace.
Connect one line to its neighbor
The second seam forms a tube with the strip lines shifted by one band. The matching reference is where a line meets the sewing line, not simply where it touches the raw edge. Check the connection on a paper or scrap model: a correctly offset path leads from one end through the whole tube. A zero-offset arrangement produces separate rings instead of the intended continuous strip.
Check the numbers
Plan a 2-inch strip, 180 inches long
The example uses target mode, a 2-inch raw strip, 180-inch target, quarter-inch tube seams, 10% extra trim reserve, 4 inches of end trimming and 44-inch usable fabric.
Target search selects a 20.75-inch square after rounding upward to the next one-eighth inch. Its gross area is 430.5625 square inches. Without losses, area divided by the 2-inch strip width would suggest 215.28125 inches; that is only the theoretical ceiling.
The model reserves 4 × 20.75 × 0.25 = 20.75 square inches for the two joins. This deliberately simple seam-area budget leaves 409.8125 square inches for the next step. It is not an exact simulation of every stitched intersection.
Ten percent of the remaining area is 40.98125 square inches. After that reserve, 368.83125 square inches remain. Divide by 2 and deduct the 4-inch total end trim: estimated usable length is approximately 180.4156 inches.
The 20.75-inch square fits the 44-inch usable width. A smaller 20.625-inch square misses the target under the same assumptions. For an existing 24-inch square with those settings, the estimate is 244.4 inches. Sew a sample to decide whether the chosen reserves suit the cloth and your cutting method.
Bias cloth can lengthen when handled. Measure the strip relaxed after appropriate pressing, without pulling it along a ruler. Extra apparent length from stretching does not provide consistent width or stable finishing. The calculator records geometric planning lengths and does not model elastic recovery or fabric-specific distortion.
Keep finished width separate
Single-fold tape, double-fold tape and quilt binding use different folding arrangements. Thick edges can consume additional width. This page accepts a confirmed raw width so it does not force a universal multiplier onto all those constructions. A width change can alter the feasible square and the number of visible bands.
Check at the sewing line
Simply aligning chalk marks at raw edges can shift the cut path after the seam is sewn. Baste the proposed one-band offset and inspect the path on both sides before making the second permanent join. Work with a removable marking method suitable for the cloth and keep the opposite tube wall out of the cutting path.
Reserve installation length separately
The target should already include the length needed to join binding ends on the finished item and complete your chosen application. End trimming in this tool covers preparation of the newly made strip. Those are different operations. Record both decisions so a maker does not mistake a preparation estimate for an exact finished-project perimeter.
The method, explained
A visible estimate with a reversible calculation
Rule version 1.0.0
Separate the three deductions
For square side A, seam S and raw strip width W, gross area is A². The planning seam-area reserve is 4AS. Extra trim percentage T is applied to the remaining area, then the result is divided by W. Finally subtract total end trimming E. Estimated yield is max(0, (A² − 4AS) × (1 − T/100) / W − E), rounded downward at stored micrometer precision.
Search upward for a practical square
Target mode searches for the smallest side meeting the entered target under this model, then rounds upward to one-eighth inch or one millimeter. Both modes require a square at least four strip widths across and enough space for the selected seam reserve. These bounds keep tiny, impractical tube arrangements out of the estimate; they do not certify the final strip.
Use a sample to calibrate the reserve
The seam-area budget and extra trimming percentage are explicit assumptions rather than an exact sewn-surface model. Incomplete bands, real seam geometry and operator technique change actual output. Compare a sample’s relaxed usable length with the estimate, adjust the reserve and keep that revised file. The drawing explains cutting order and offset; it is not a calibrated template.
How big a square do I need for continuous bias binding?
Choose target mode and enter the raw strip width, needed length and preparation reserves. The result is rounded upward to a practical square increment. It must still fit the usable cloth. Treat it as a planning estimate and confirm the selected losses with a same-fabric sample.
How much bias tape can I get from a square?
Choose existing-square mode and enter its trimmed side. The ledger shows the area-only ceiling, seam-area deduction, extra trim deduction and end trimming before the estimated usable length. This makes clear why the answer is lower than simply dividing square area by strip width.
Why did I cut rings instead of one long strip?
The tube may have been joined without shifting the line connections by one strip. Check the diagram and test the seam with paper first. Matching adjacent lines at the sewing line creates a continuing path; matching each line straight back to itself closes individual rings.
Can I use a rectangle or a fat quarter?
This implementation supports a square start only. You may trim a usable square from a rectangular piece and enter that side, but the remaining fabric is not included in its yield. A full rectangular continuous-bias method needs a separate validated layout and should not be approximated by equivalent area here.
Is the estimated length guaranteed?
No. The formula budgets identifiable losses but cannot predict the exact incomplete band, pressing distortion or cutting accuracy. The printed record retains those assumptions. Make a sample, allow practical spare length and measure the finished raw strip without tension before relying on it.
Can this replace the piping material calculator?
Use the piping tool to establish the cord and covering-strip requirement first. This page helps prepare a continuous bias strip of a confirmed raw width. It does not calculate cord diameter, how much cloth wraps the cord or the installation allowance for a particular welt seam.
Take the plan to your worktable.
Review the measurements, keep a backup and print a proof.