Use this ripplefold calculator to turn a supported track specification into a counted tape plan, cumulative snap marks and a face-fabric cutting record. Keep the master model, fullness class and actual tape fit together throughout the job.
Private, on this device
Supports Kirsch Hollis butt masters: 1047140/1047141 for equal center pairs and extended 1054654/1054655 for one-way draw, using manual v9.26-1. Straight tracks, 4¼-inch factory snap tape and plain face fabric only. Overlap masters, other Wave systems, lining and pattern matching are outside this calculation.
EXAMPLE
Example inputs: replace with your measured project.
Download example JSON · Private file processing in this browser. Export a backup for other devices.
Records use the selected Hollis butt-master table. Test the physical tape and track before cutting fabric.
Independent local project
Save here for this browser and export JSON for a portable backup. No file is uploaded.
Start with the hardware on the order
01
Confirm the master family and draw
Read the model on the hardware specification before measuring the fabric. A center pair uses two equal coverage areas and the supported two-way butt-master table. A single panel uses the extended one-way butt-master table, whether it parks left or right. The model changes when the opening direction changes. A similar-looking carrier from another manufacturer should not be assigned these numbers merely because it produces soft waves.
02
Enter track coverage and return separately
Track width is the straight operating span that the treatment must cover. It does not include cloth wrapping back to the wall. Enter that return as a separate length per panel, measured from the final factory snap to the finished return edge. The calculator adds the tape end hem explicitly. Measure finished curtain drop from the intended finished top, with track and floor clearances already resolved on the work order.
03
Choose the ordered fullness class
Select 60, 80, 100 or 120 percent according to the carriers being supplied. These are hardware classes linked to carrier spacing, not permission to multiply every dimension by a generic fullness factor. The program selects the first published row that covers the requested panel width. Read both the requested coverage and selected chart coverage; the difference comes from discrete snap counts. The table is never extended beyond its published range.
04
Fit the tape, then release the cloth
Count the factory snaps, mark the additional master snap and test the prepared tape on the actual track. Confirm which factory snaps are supported by the master assembly and select that count when checking loose carriers. Measure the tape after its end hems before committing expensive cloth. Save JSON for later revisions and print the record so the maker can see the table model, input dimensions and intended allowances together.
Two checks before sewing the header
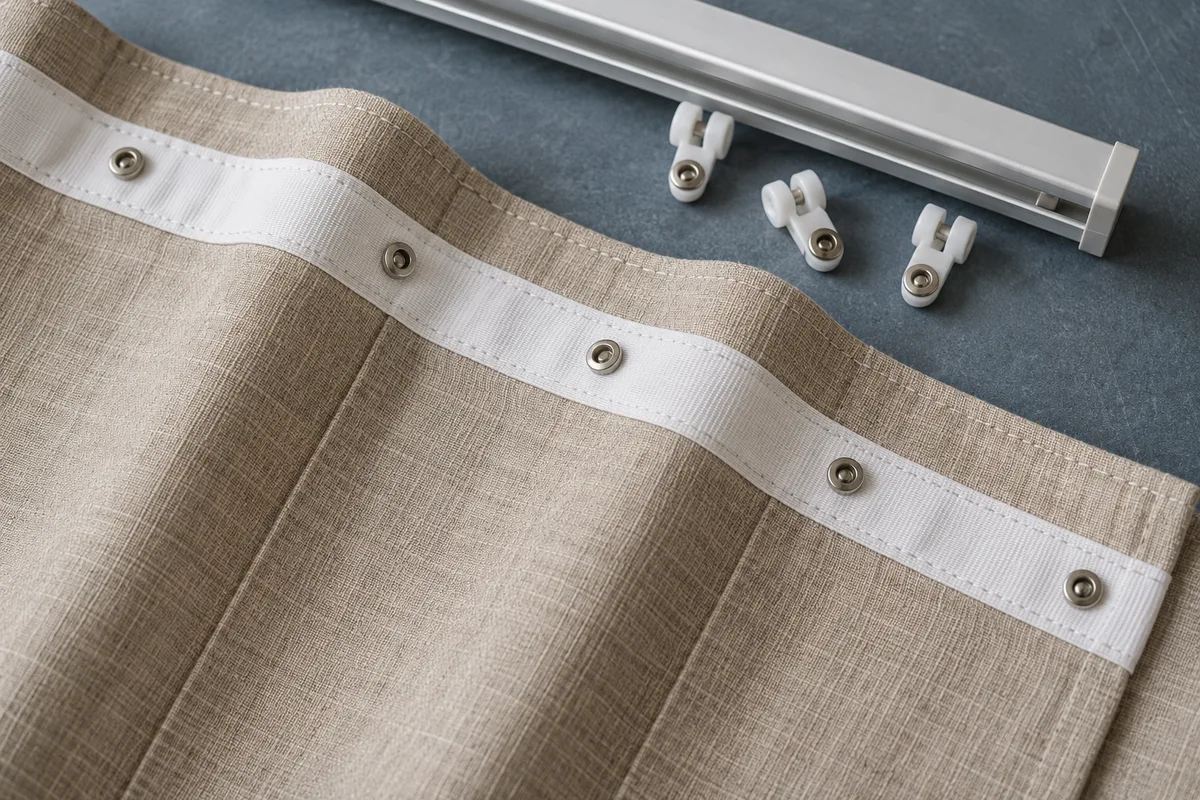
Treat tape and carriers as a matched system
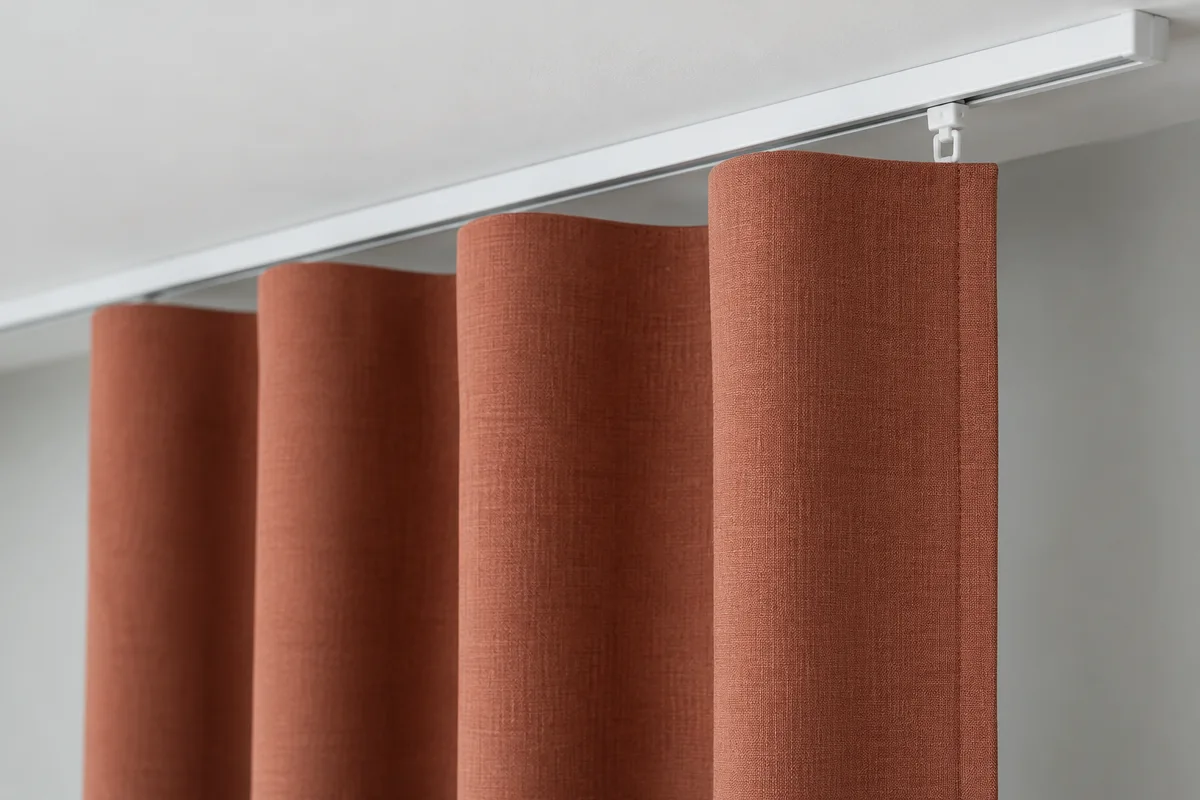
The tape contains regularly spaced factory snaps, while the track controls how those points extend when the curtain closes. Check the physical fit as well as the numerical count. Tape manufacturing variation and the attachment arrangement at a master can change the practical setup. A short hanging sample also reveals whether the chosen weave forms clean waves. The photograph illustrates the relationship; the selected product specification controls the job.
Mark from the same raw leading end
Every coordinate on this page starts at the leading raw cut edge of the tape. The added M snap and factory F snaps remain distinct. The leading hem line and return cut edge appear in the coordinate export as separate references. For a pair, use the same leading-to-return sequence on each panel, mirrored in the installed treatment. Do not start one panel from its return end and compare those numbers directly with the other panel.
Check the numbers
A 120-inch center pair at 80 percent fullness
Use the supported Hollis two-way butt masters, a 120-inch track, an 80 percent carrier class and a 3-inch return per panel. For fabric preparation, use 96-inch finished drop, 54-inch usable width, 3-inch total side take-up per edge, half-inch joining seams, 1-inch top take-up, 8-inch bottom take-up and 4 inches of batch reserve.
Each panel must cover 60 inches. In this specific Hollis table, the 26-snap row covers 58.875 inches at 80 percent, which is insufficient. The next row supplies 28 factory snaps and covers 63.625 inches. Do not substitute the row from an Estate or another master family.
The raw tape length per panel is 2.25 + 27 × 4.25 + 3 + 0.5 = 120.5 inches. Turning under half an inch at both ends leaves a nominal 119.5-inch finished tape. The added M snap is 1.25 inches from the leading raw edge; F1 is at 2.25 inches.
If the physical master supports two factory snaps plus M, each panel needs 26 loose carriers. There are two master assemblies and two added M snaps for the whole pair. Check the actual attachment path before using these counts to order components.
The nominal joined fabric requirement is 119.5 + 6 = 125.5 inches per panel. Three 54-inch widths joined with half-inch seams produce 160 inches before side hems, leaving 34.5 inches to trim. Each cut is 105 inches long. Six cuts plus 4 inches of reserve require 634 inches, approximately 17.611 yards. Fit the actual tape before trimming to that nominal width.
The detailed butt-master cutting diagram defines the raw tape formula used here. The tool then deducts the two explicit end hems to show nominal finished tape width. Those are different quantities. Use the measured finished tape to settle the cloth header size if your supplied tape differs; do not add an unexplained allowance or silently treat chart tape length as fabric cut width.
Separate added snaps from loose carriers
A factory snap count does not equal a shopping list for loose wheeled carriers. Some factory positions attach to the master assembly, and the added M snap also attaches there. The exposed master-supported count makes that assumption reviewable. The number of master assemblies is one per panel. Return hooks and other track components still follow the supplier’s order specification.
Fabric cuts use one clear method
The cloth plan uses plain fabric cut vertically in full usable widths. Each additional joined width consumes a seam allowance on both joining edges. Side hems are total take-up per outside edge; top and bottom allowances are total added lengths. Pattern positioning, shrinkage, lining and railroaded cloth need their own confirmed plans before an order is finalized.
Keep portable records
JSON preserves editable dimensions and construction settings. CSV records inputs, the selected hardware model, counts and fabric cuts; a separate CSV provides all tape coordinates. The print record carries the same evidence. Cutting labels identify the full-width cloth cuts and remind the maker to use the original trimming plan. Local storage belongs to this browser, so export a backup for another device.
The method, explained
Table selection and tape arithmetic
Rule version 1.0.0
Select a row for each panel
For an equal pair, divide track coverage by two; for one-way draw use the whole track. Look up that coverage in the chosen fullness column of the appropriate Hollis table, taking the first covering row. The result retains the published coverage and estimated stack. Minimum and maximum coverages depend on the draw and fullness column; unsupported values produce an explicit error rather than an extrapolated answer.
Count and position the tape
With N factory snaps, the span between first and last factory snaps is (N − 1) × 4.25 inches. Add 2.25 inches before the first snap, the selected return and a half-inch return hem. The additional master snap is one inch before F1. All inch-based hardware constants remain physically unchanged when the display is switched to centimeters.
Prepare cloth after the tape check
Nominal finished tape width equals raw tape length minus one inch for the two end hems. Add both outside side-hem take-ups to obtain the required joined cloth width. Select enough full fabric widths after subtracting the seams consumed at each join. Cut length equals finished drop plus top and bottom take-up. Batch reserve is added once after all panels.
Use the published row for your exact supported master and coverage. The output separates factory snaps per panel, one added master snap and loose carriers. A center pair has two panels, so confirm both per-panel and whole-order quantities. Counting only the distance between factory snaps misses the leading and return construction.
Can I use 100 percent fullness as exactly twice the track width?
A rough multiplier cannot establish the final snap count or end details. Discrete carrier positions and the selected master affect the row that covers the track. Use the hardware fullness class for table selection, then count the actual tape and check its finished width before preparing the cloth.
Does this calculate every Wave or S-fold system?
No. This page supports the named Hollis butt-master families with 4¼-inch factory tape spacing. Other systems can use different hooks, glider cords, tape spacing and end arrangements. A Wave or snake-style appearance alone does not establish compatibility. Use that system’s own fabrication guide.
Why does changing to one-way draw change the result?
One panel now covers the full track, and the supported extended one-way master uses a different chart. A pair previously covered half the track per panel. Both the coverage and hardware geometry change, so doubling a pair’s snap count is not a reliable substitute for the one-way calculation.
Can I include a patterned face fabric or lining?
The generated face cuts assume plain cloth without motif alignment. Lining, repeats and motif placement are not included in the displayed total. Prepare those in the corresponding tools and keep their material records distinct. The nominal header width still needs the physical tape-fit check.
Why are overlap masters unavailable?
They require a different leading-end construction and a verified matching table. This release confines calculation to the supported butt masters rather than applying their geometry to an overlap assembly. Selecting a lookalike alternative in the workroom does not update the calculation automatically; confirm the hardware before relying on the output.
Take the plan to your worktable.
Review the measurements, keep a backup and print a proof.